Put your predictions into production
The Deployment section of the Workbench is where you deploy machine learning models into production environments, ensuring they are operational, scalable, and integrated seamlessly with existing systems to deliver real-time insights and actions.
Now that you have uploaded, ingested and viewed your data, built a feature store and generated and trained models, you will need to put your recommender into production. The deployment is where you will set your recommender to be used in the Production, Quality Assurance or Test environment.
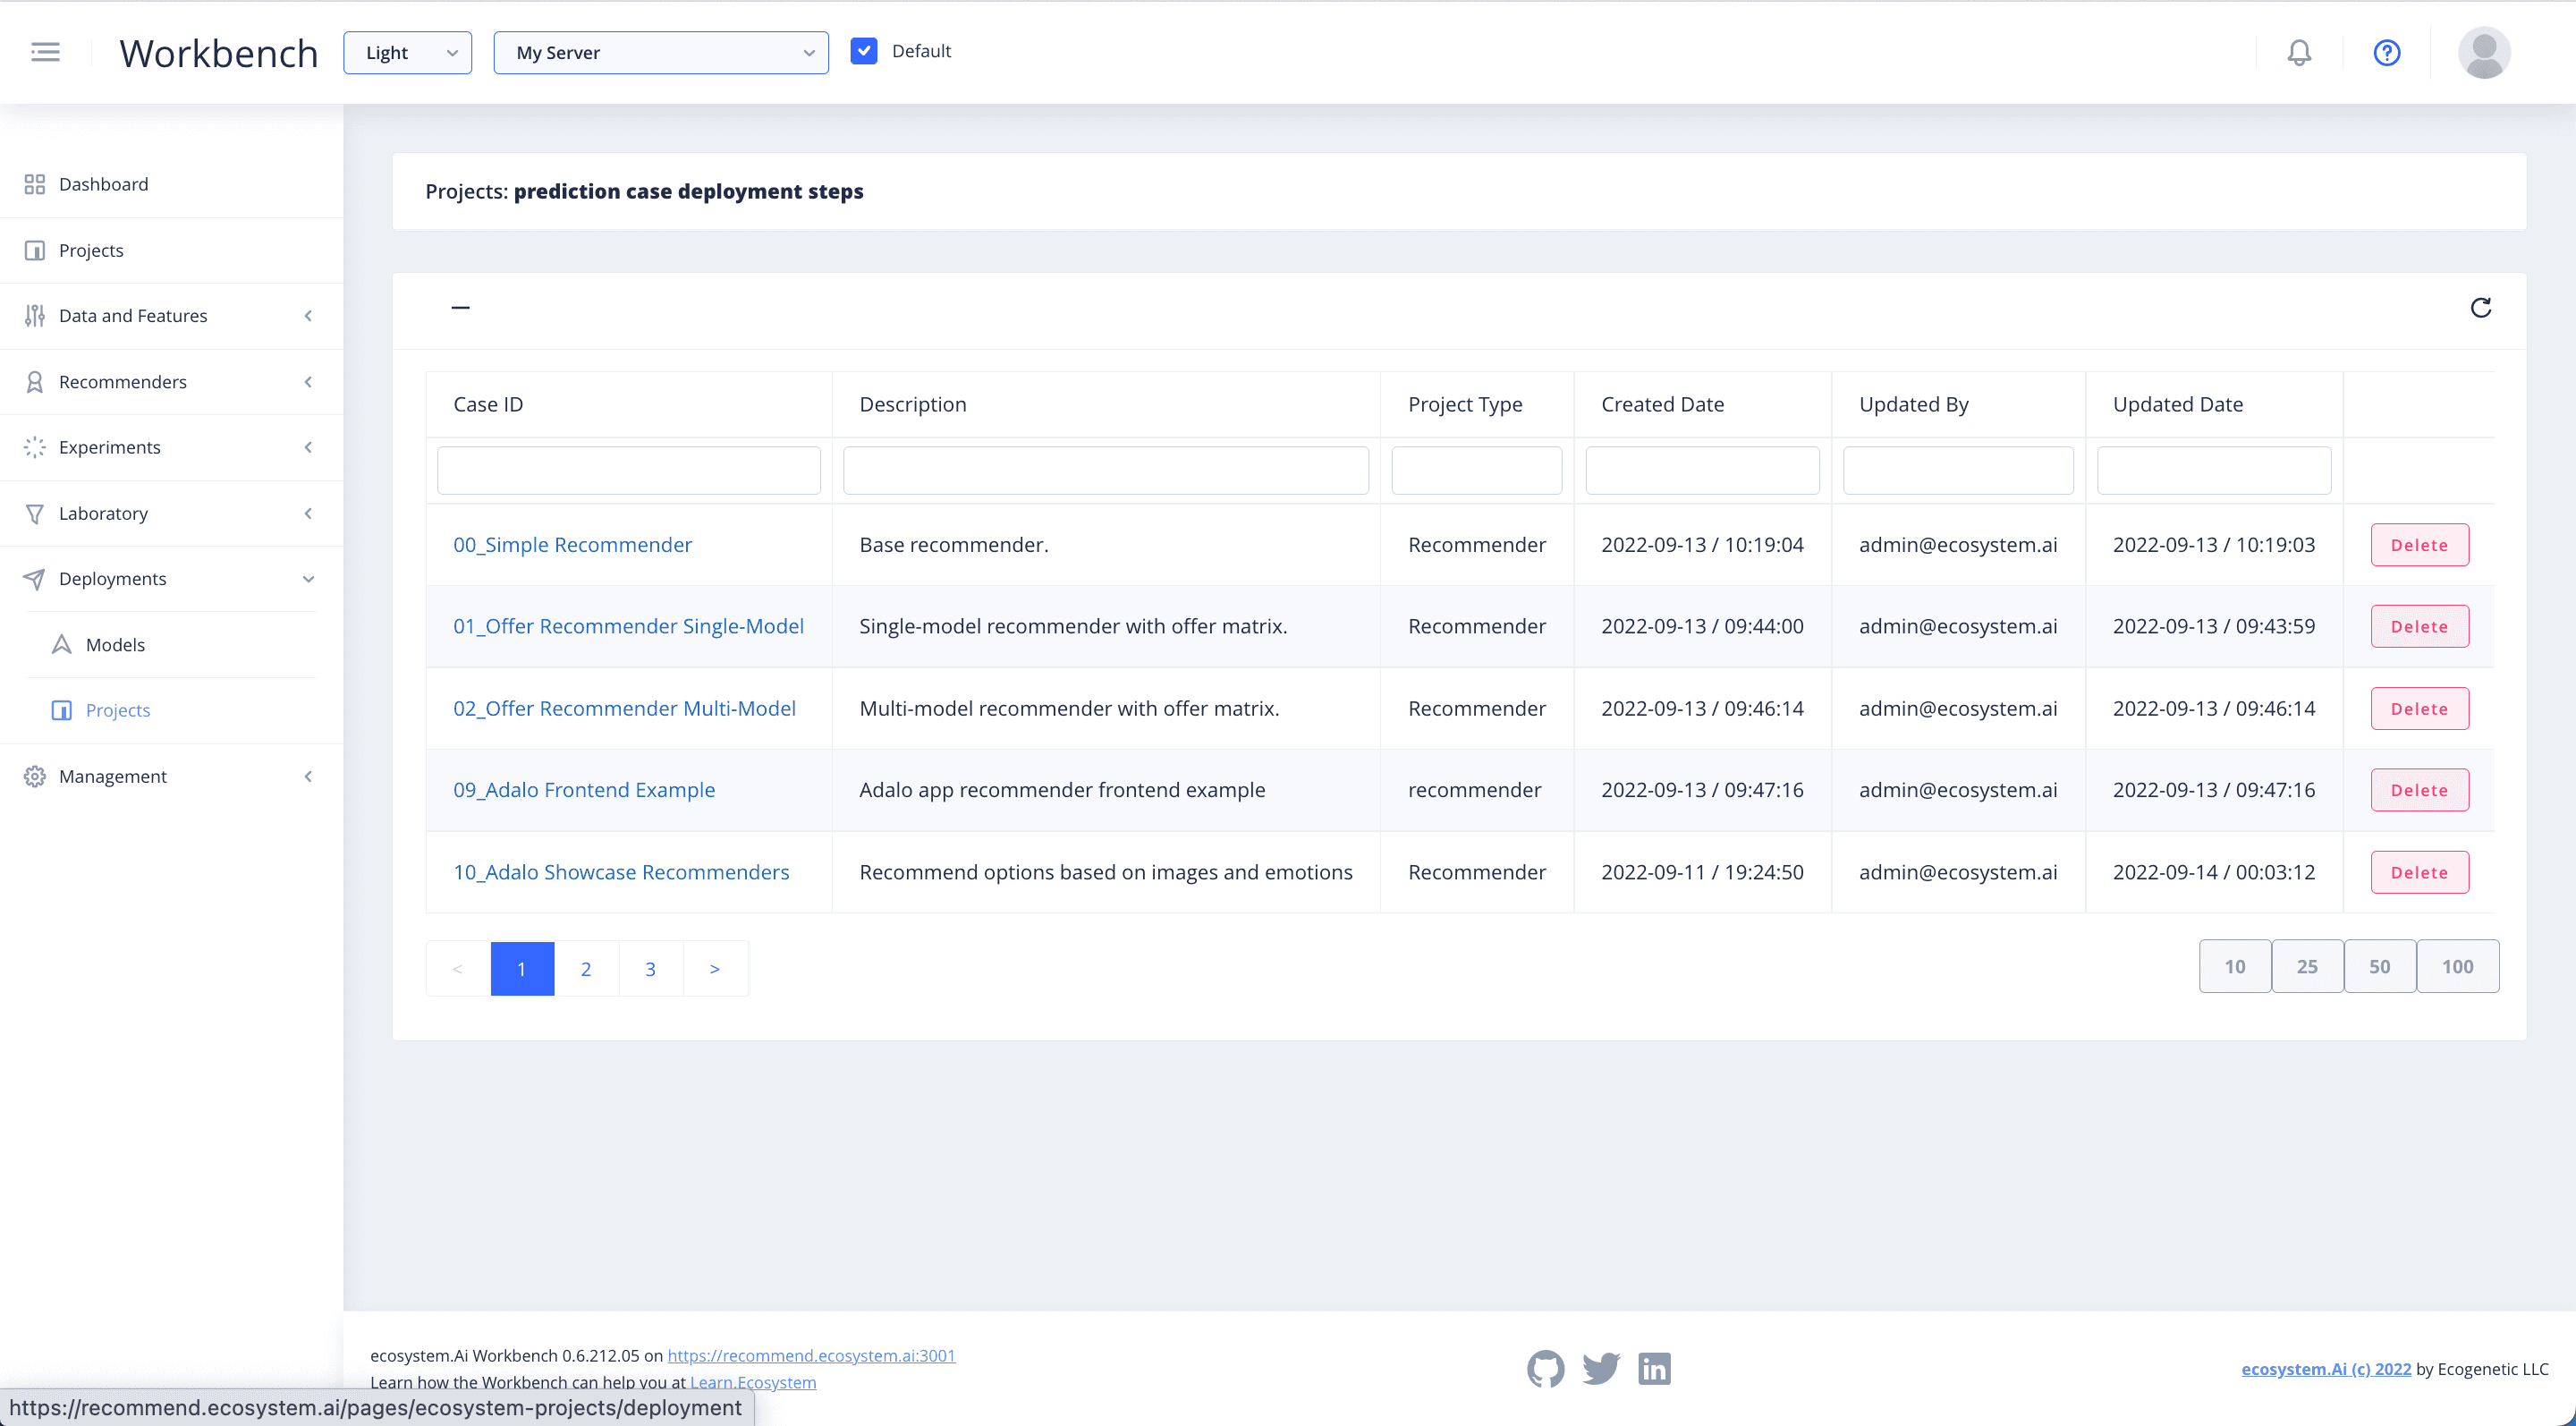
View Deployments
In the Deployment section of the Workbench, you will find Projects.
This is where you will be able to configure the parameters of your deployment, and push it to the desired environment. Find your project in the list of projects and click on it to view or create the deployments for it.
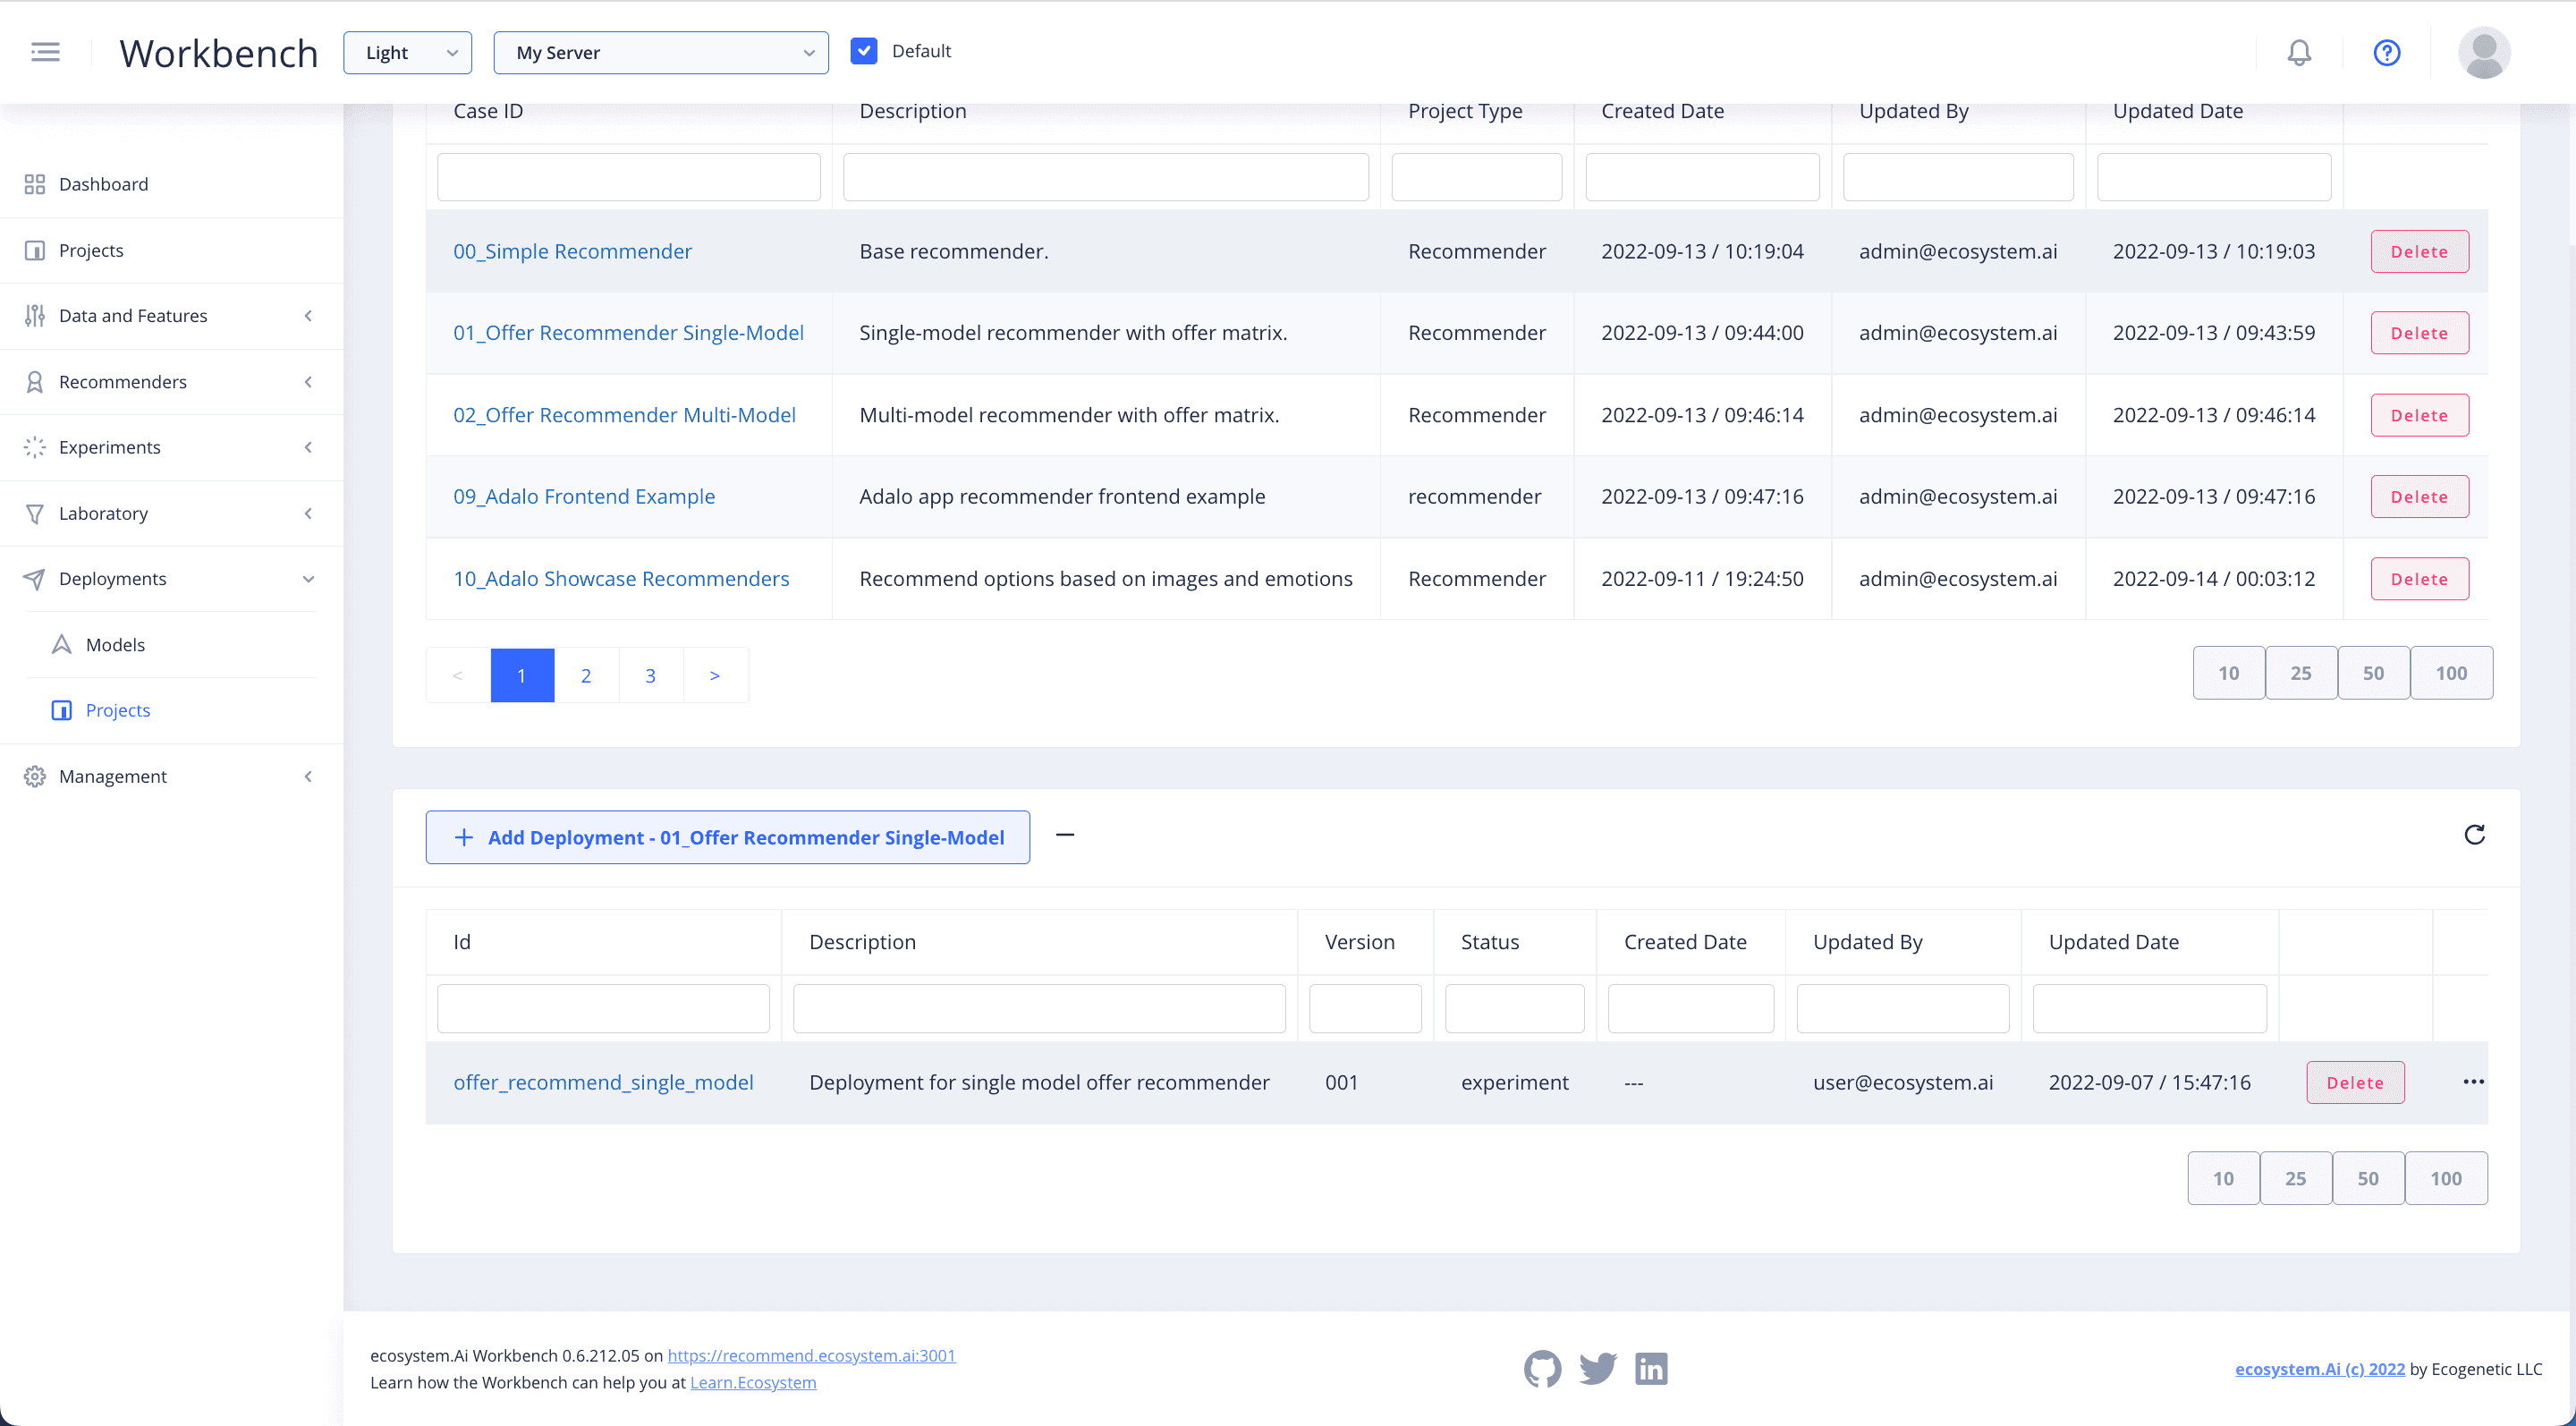
Add Deployment
To view and edit a pre-existing deployment configuration, click on the deployment name. In order to create a new deployment, select + Add Deployment. A window will open up below where you can specify the details of your new deployment.
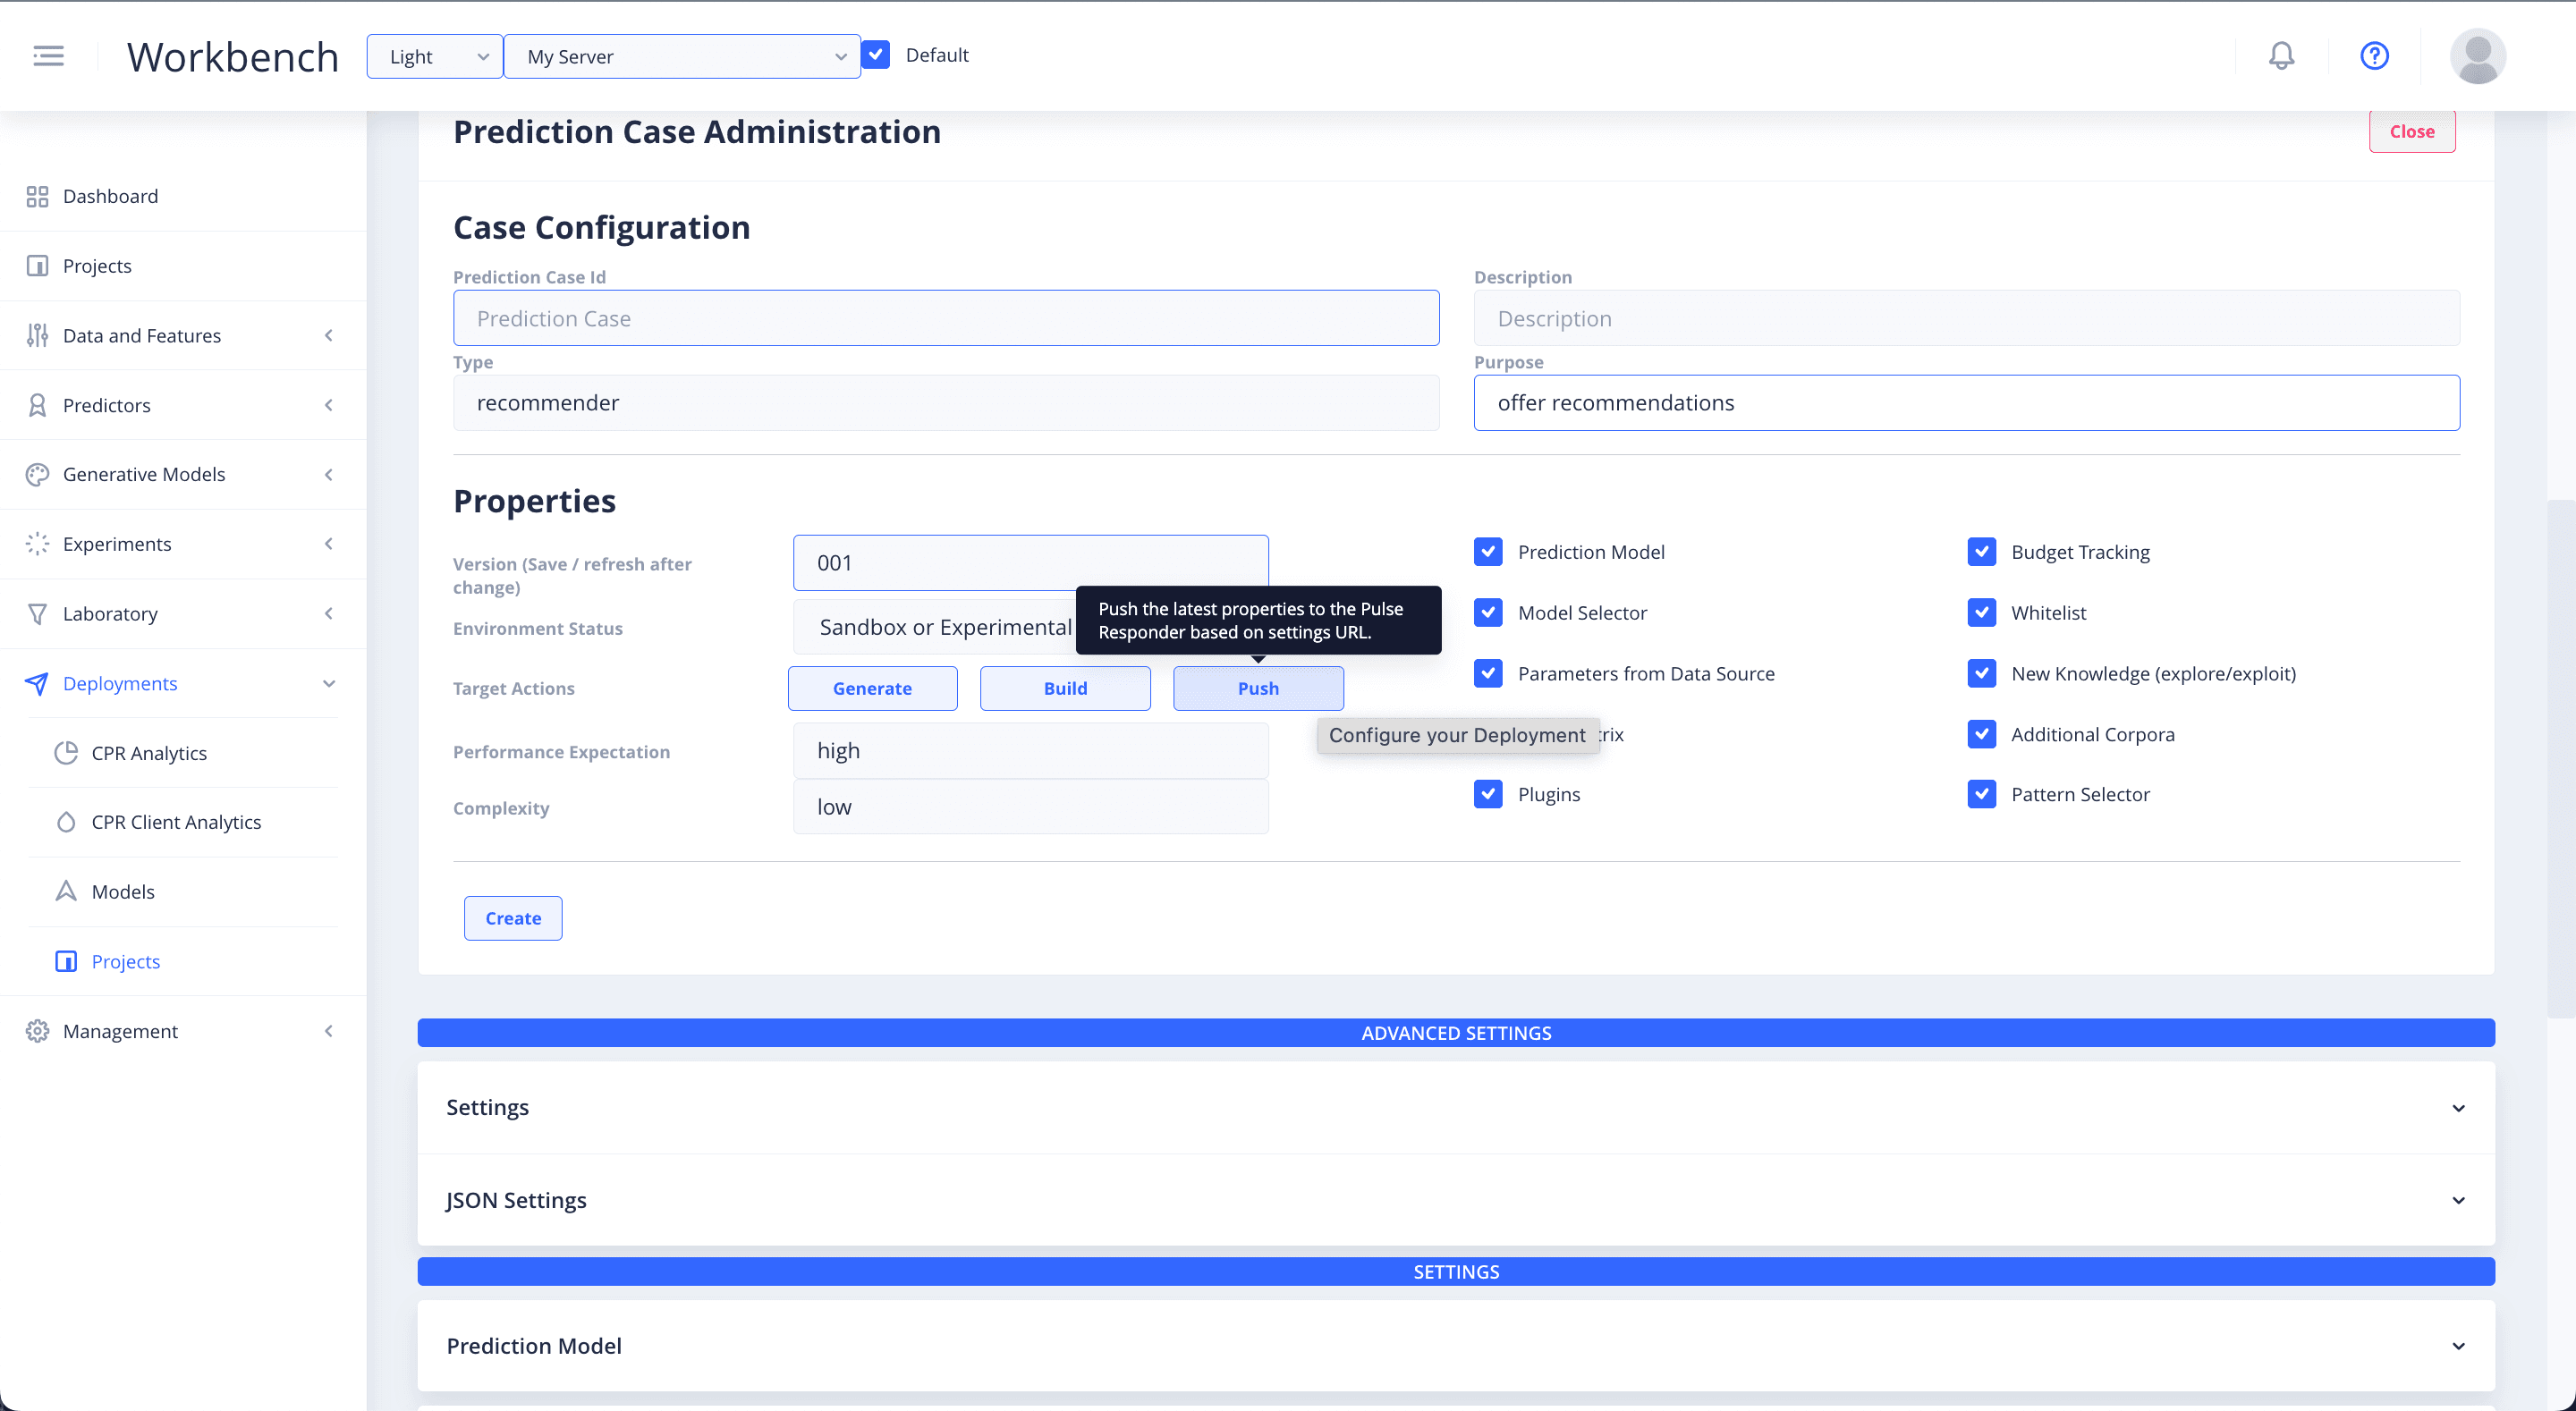
Configure Deployment
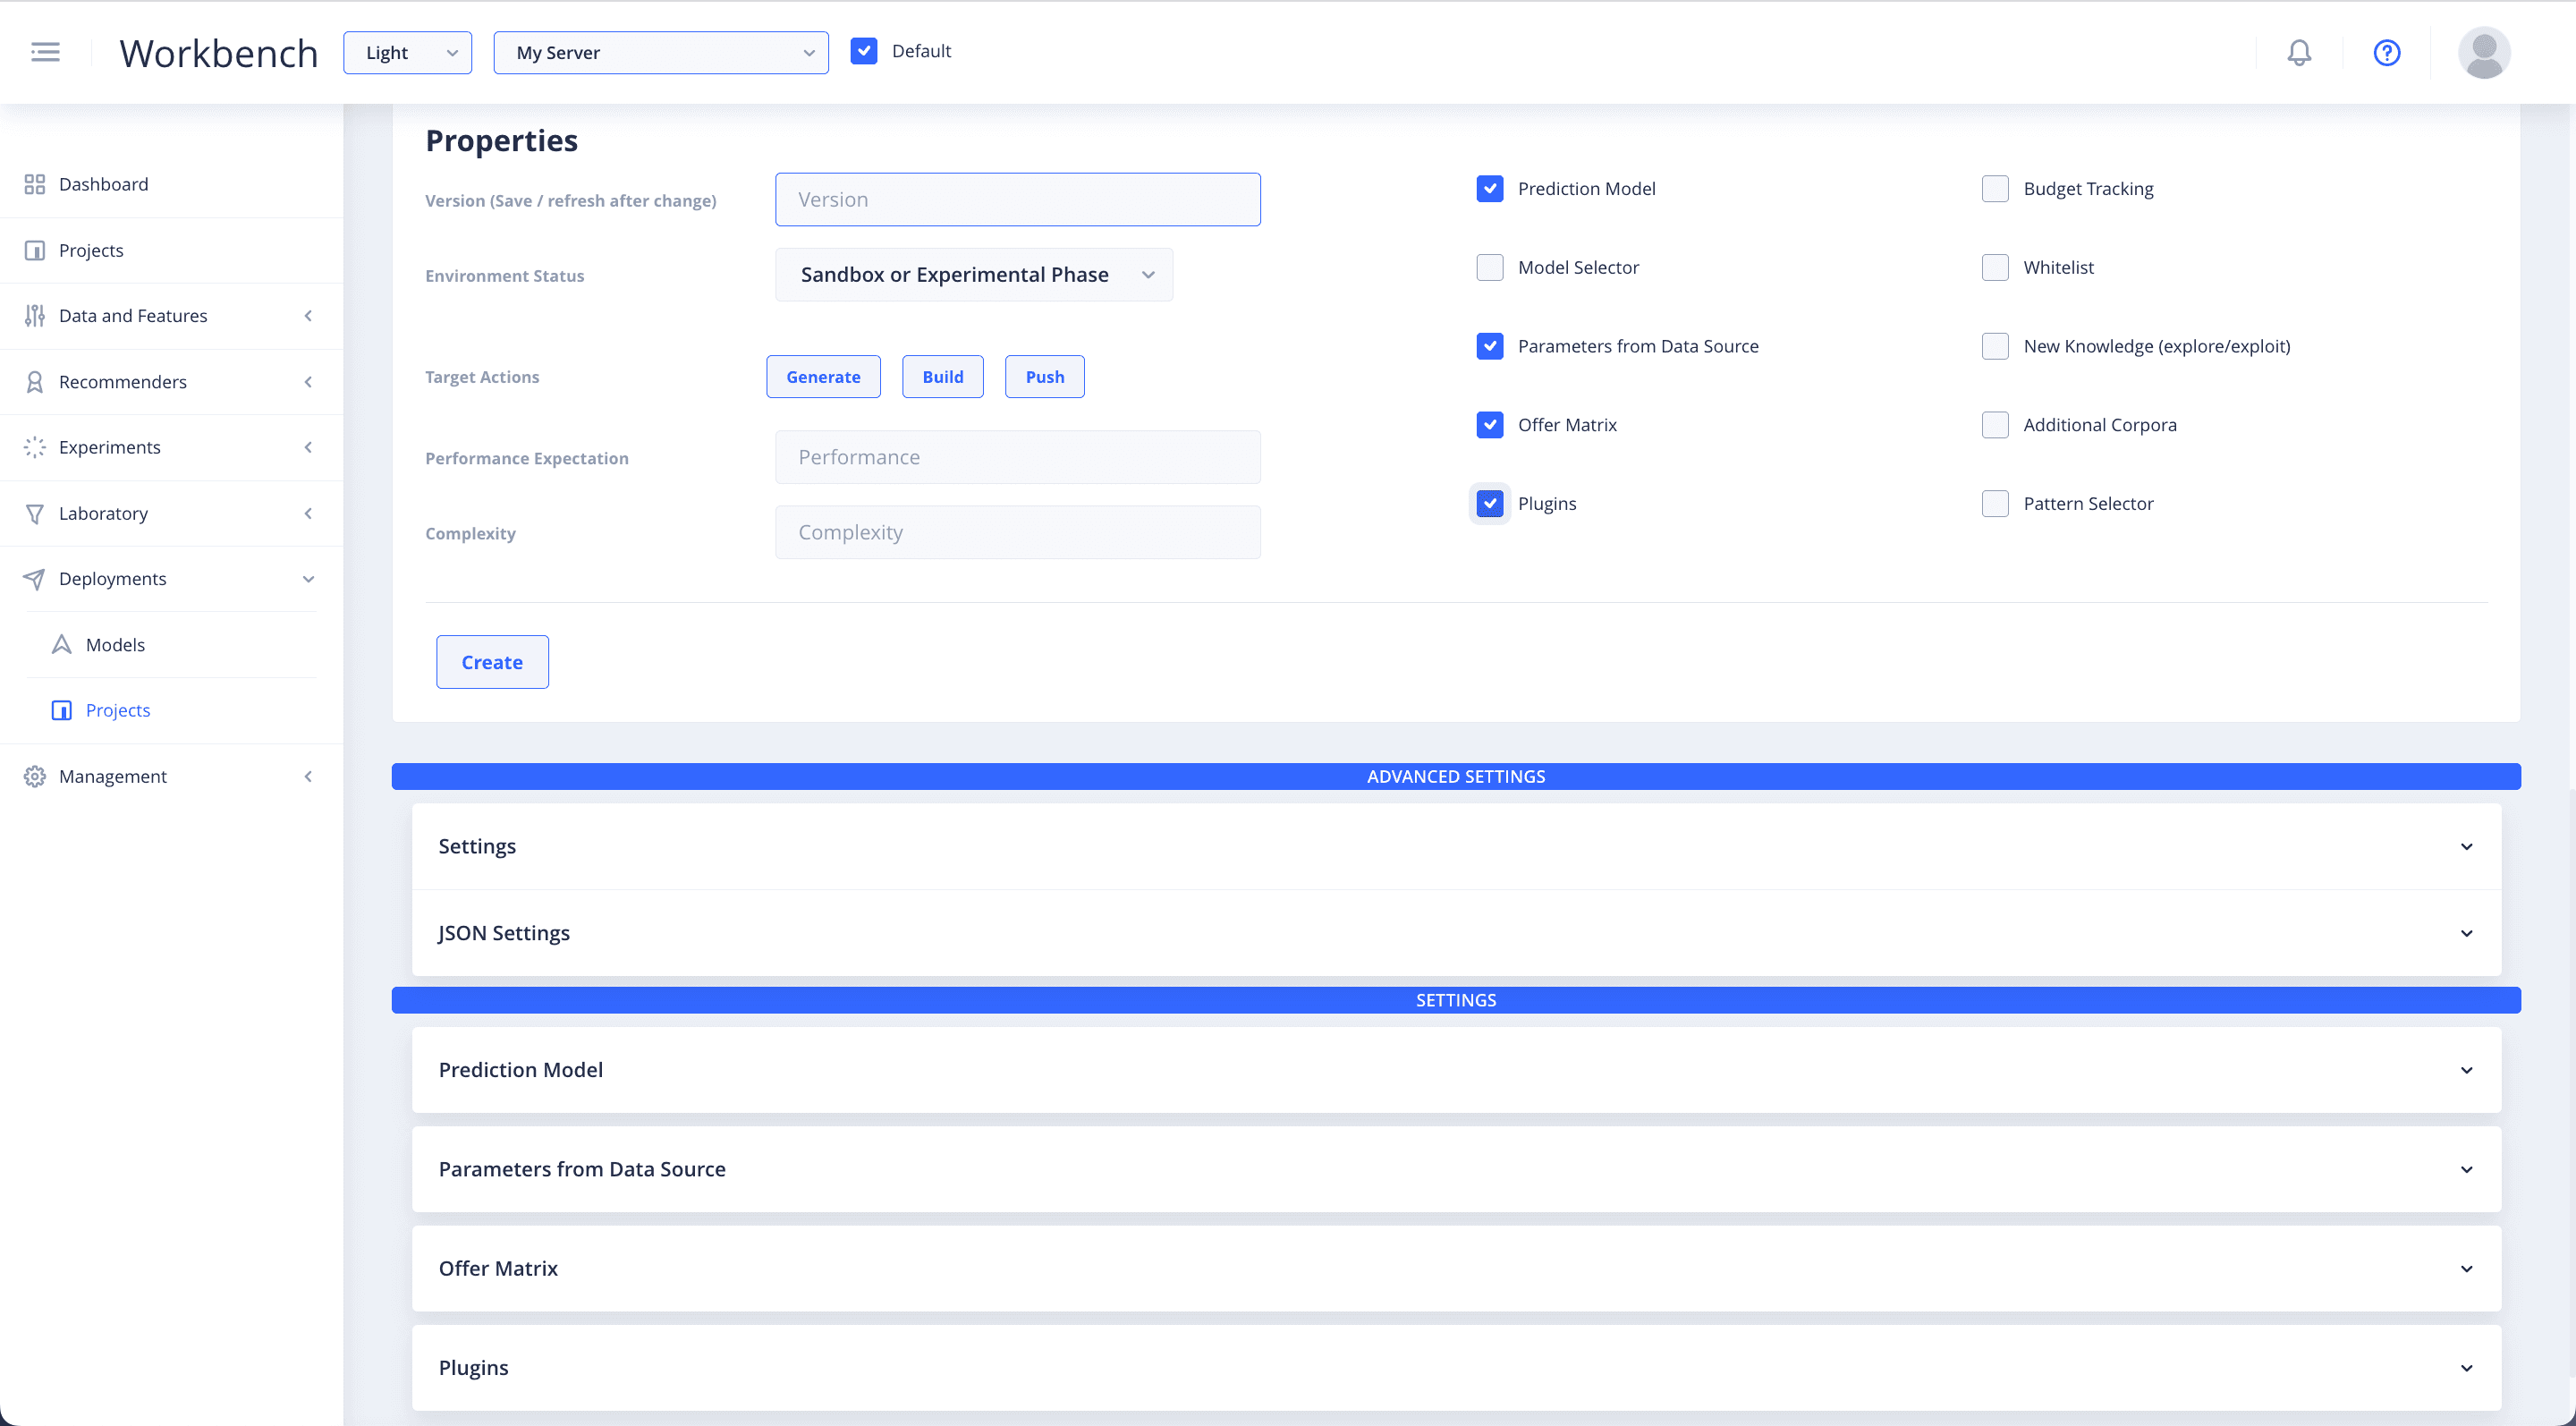
Set the case configuration for your recommender deployment.
- Create a unique Prediction Case ID name.
- Add a Description that is relevant to the specific deployment you are configuring.
- Add the Type and the Purpose of your deployment. You can leave the Type and Purpose blank if you are unsure of what to put there.
- Input the properties details and set the Version of the deployment step. This Version number should be updated every time you make changes to the deployment.
- Specify the Environment Status in which you will be deploying your configuration.
- Then input the Performance Expectation and Complexity settings for your set up.
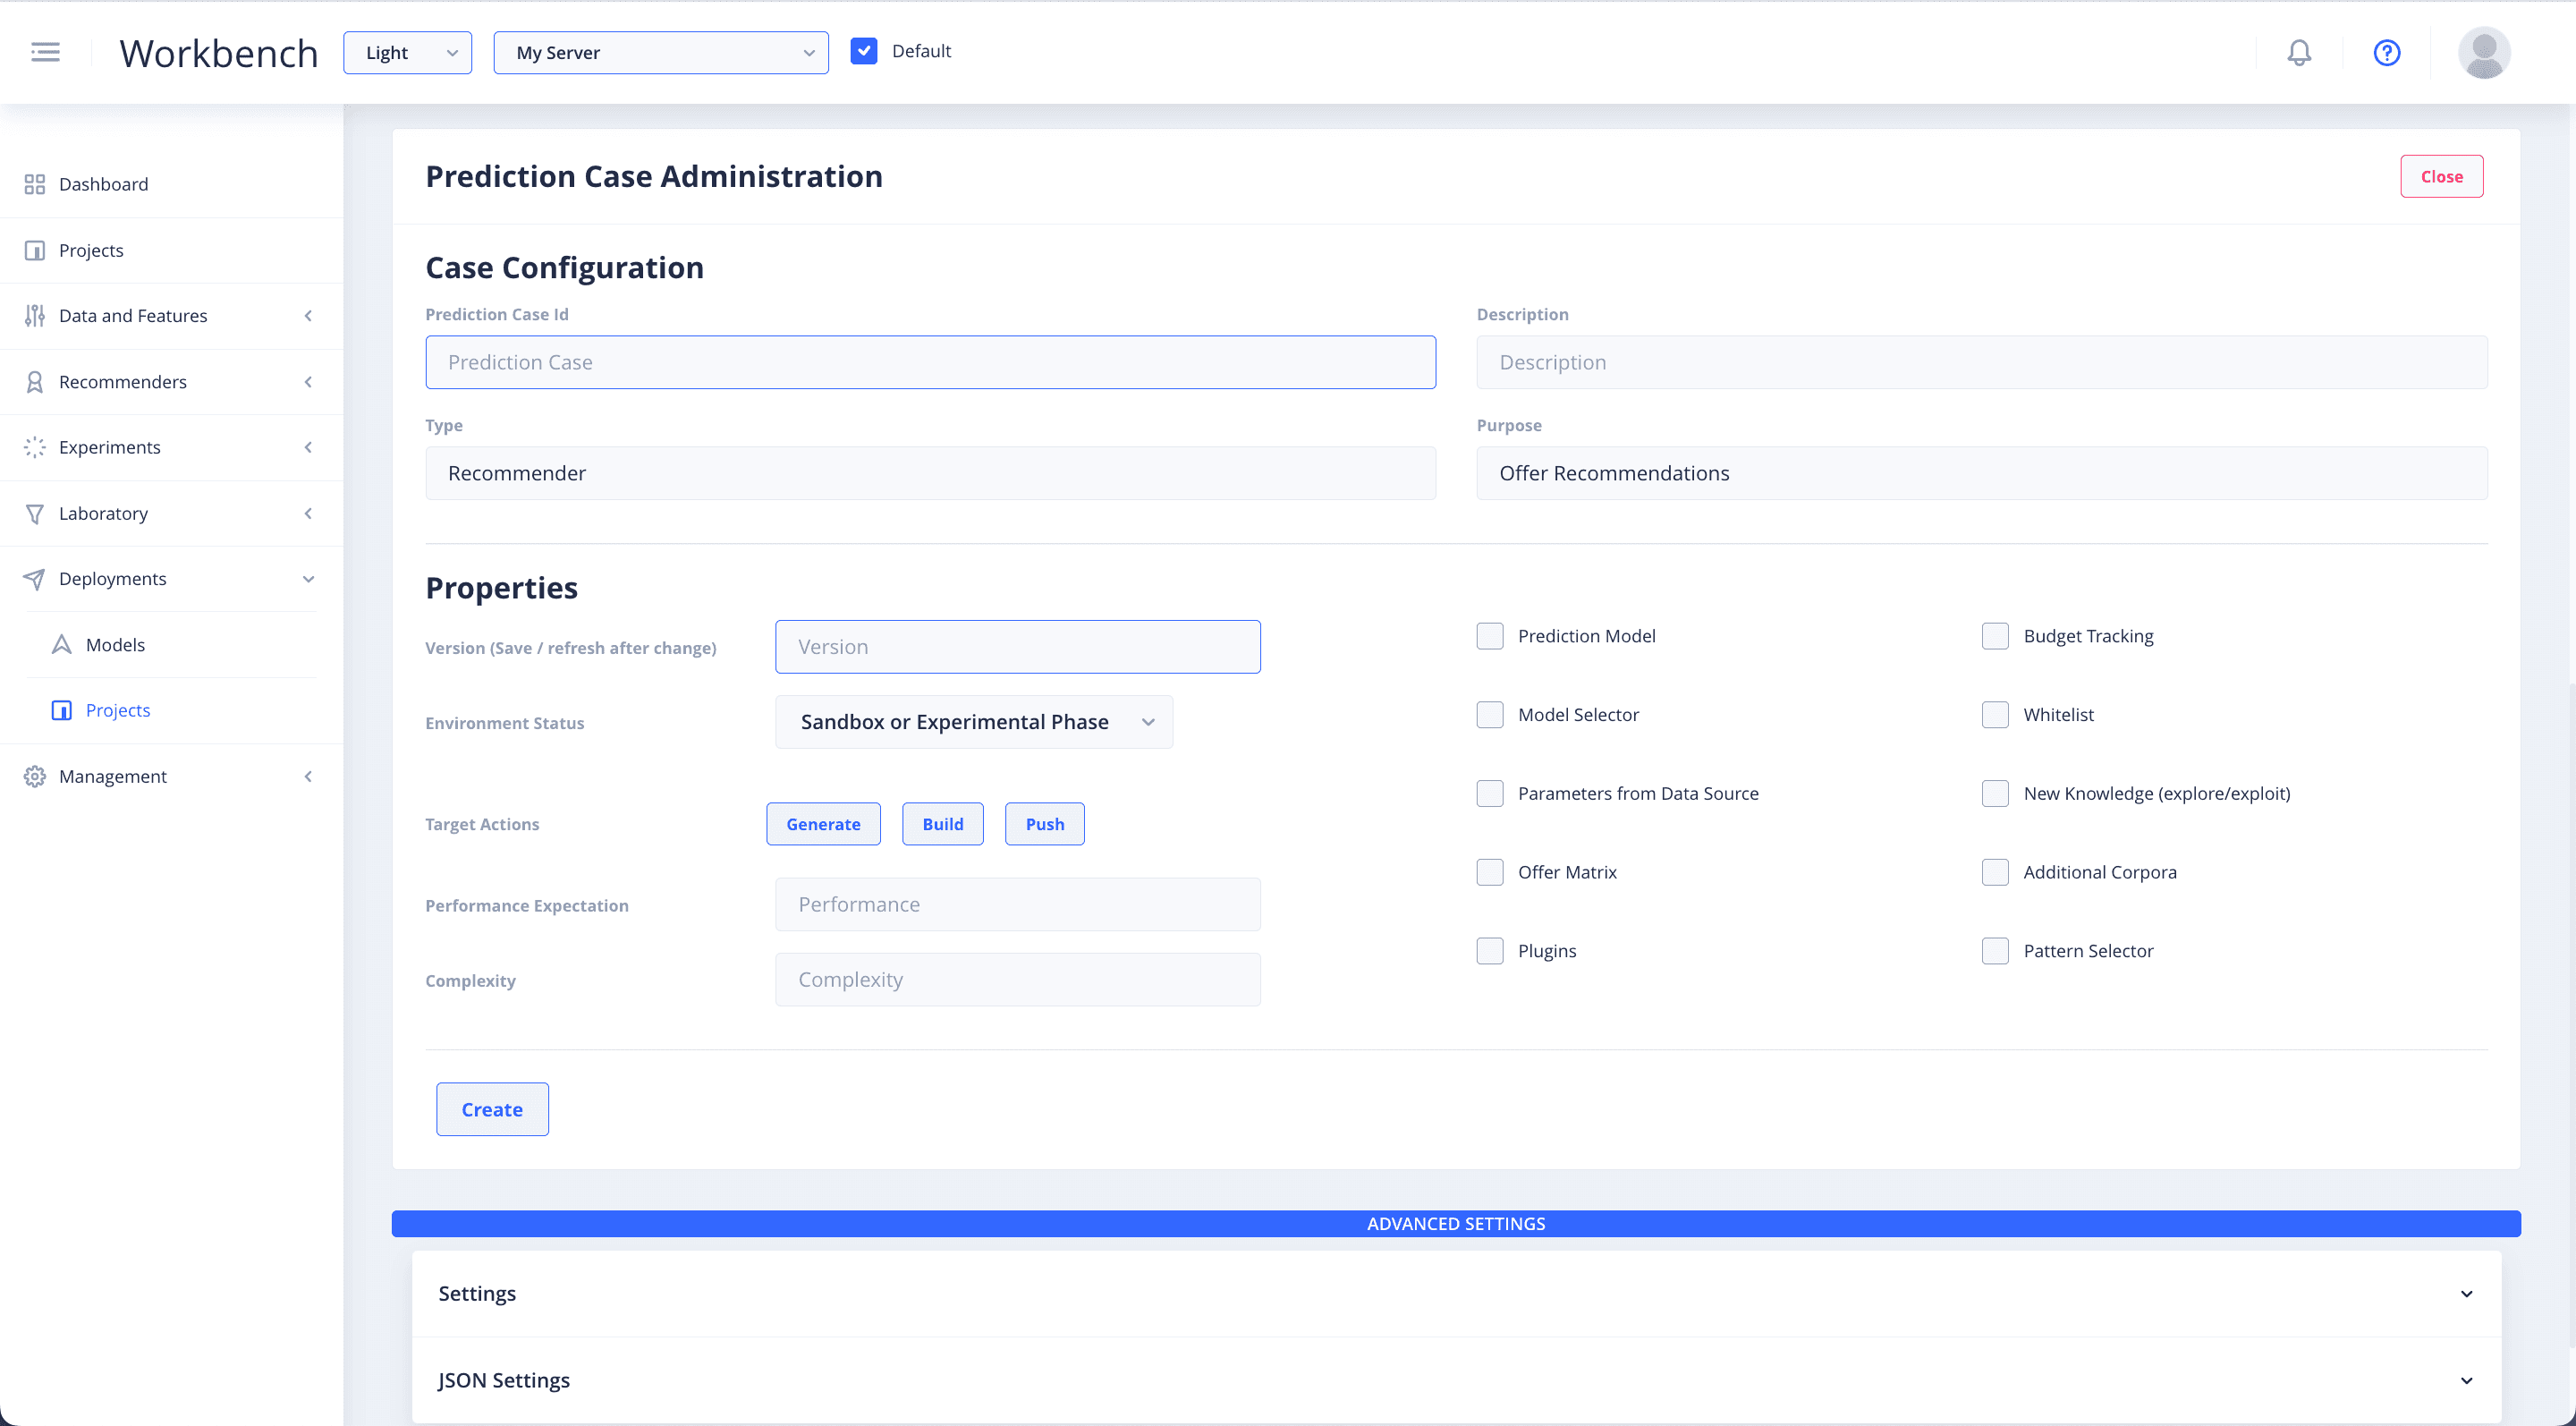
Deployment Settings
Selecting any of the checkboxes on the right, will reveal the Settings sections relevant to that option, at the bottom of the page.
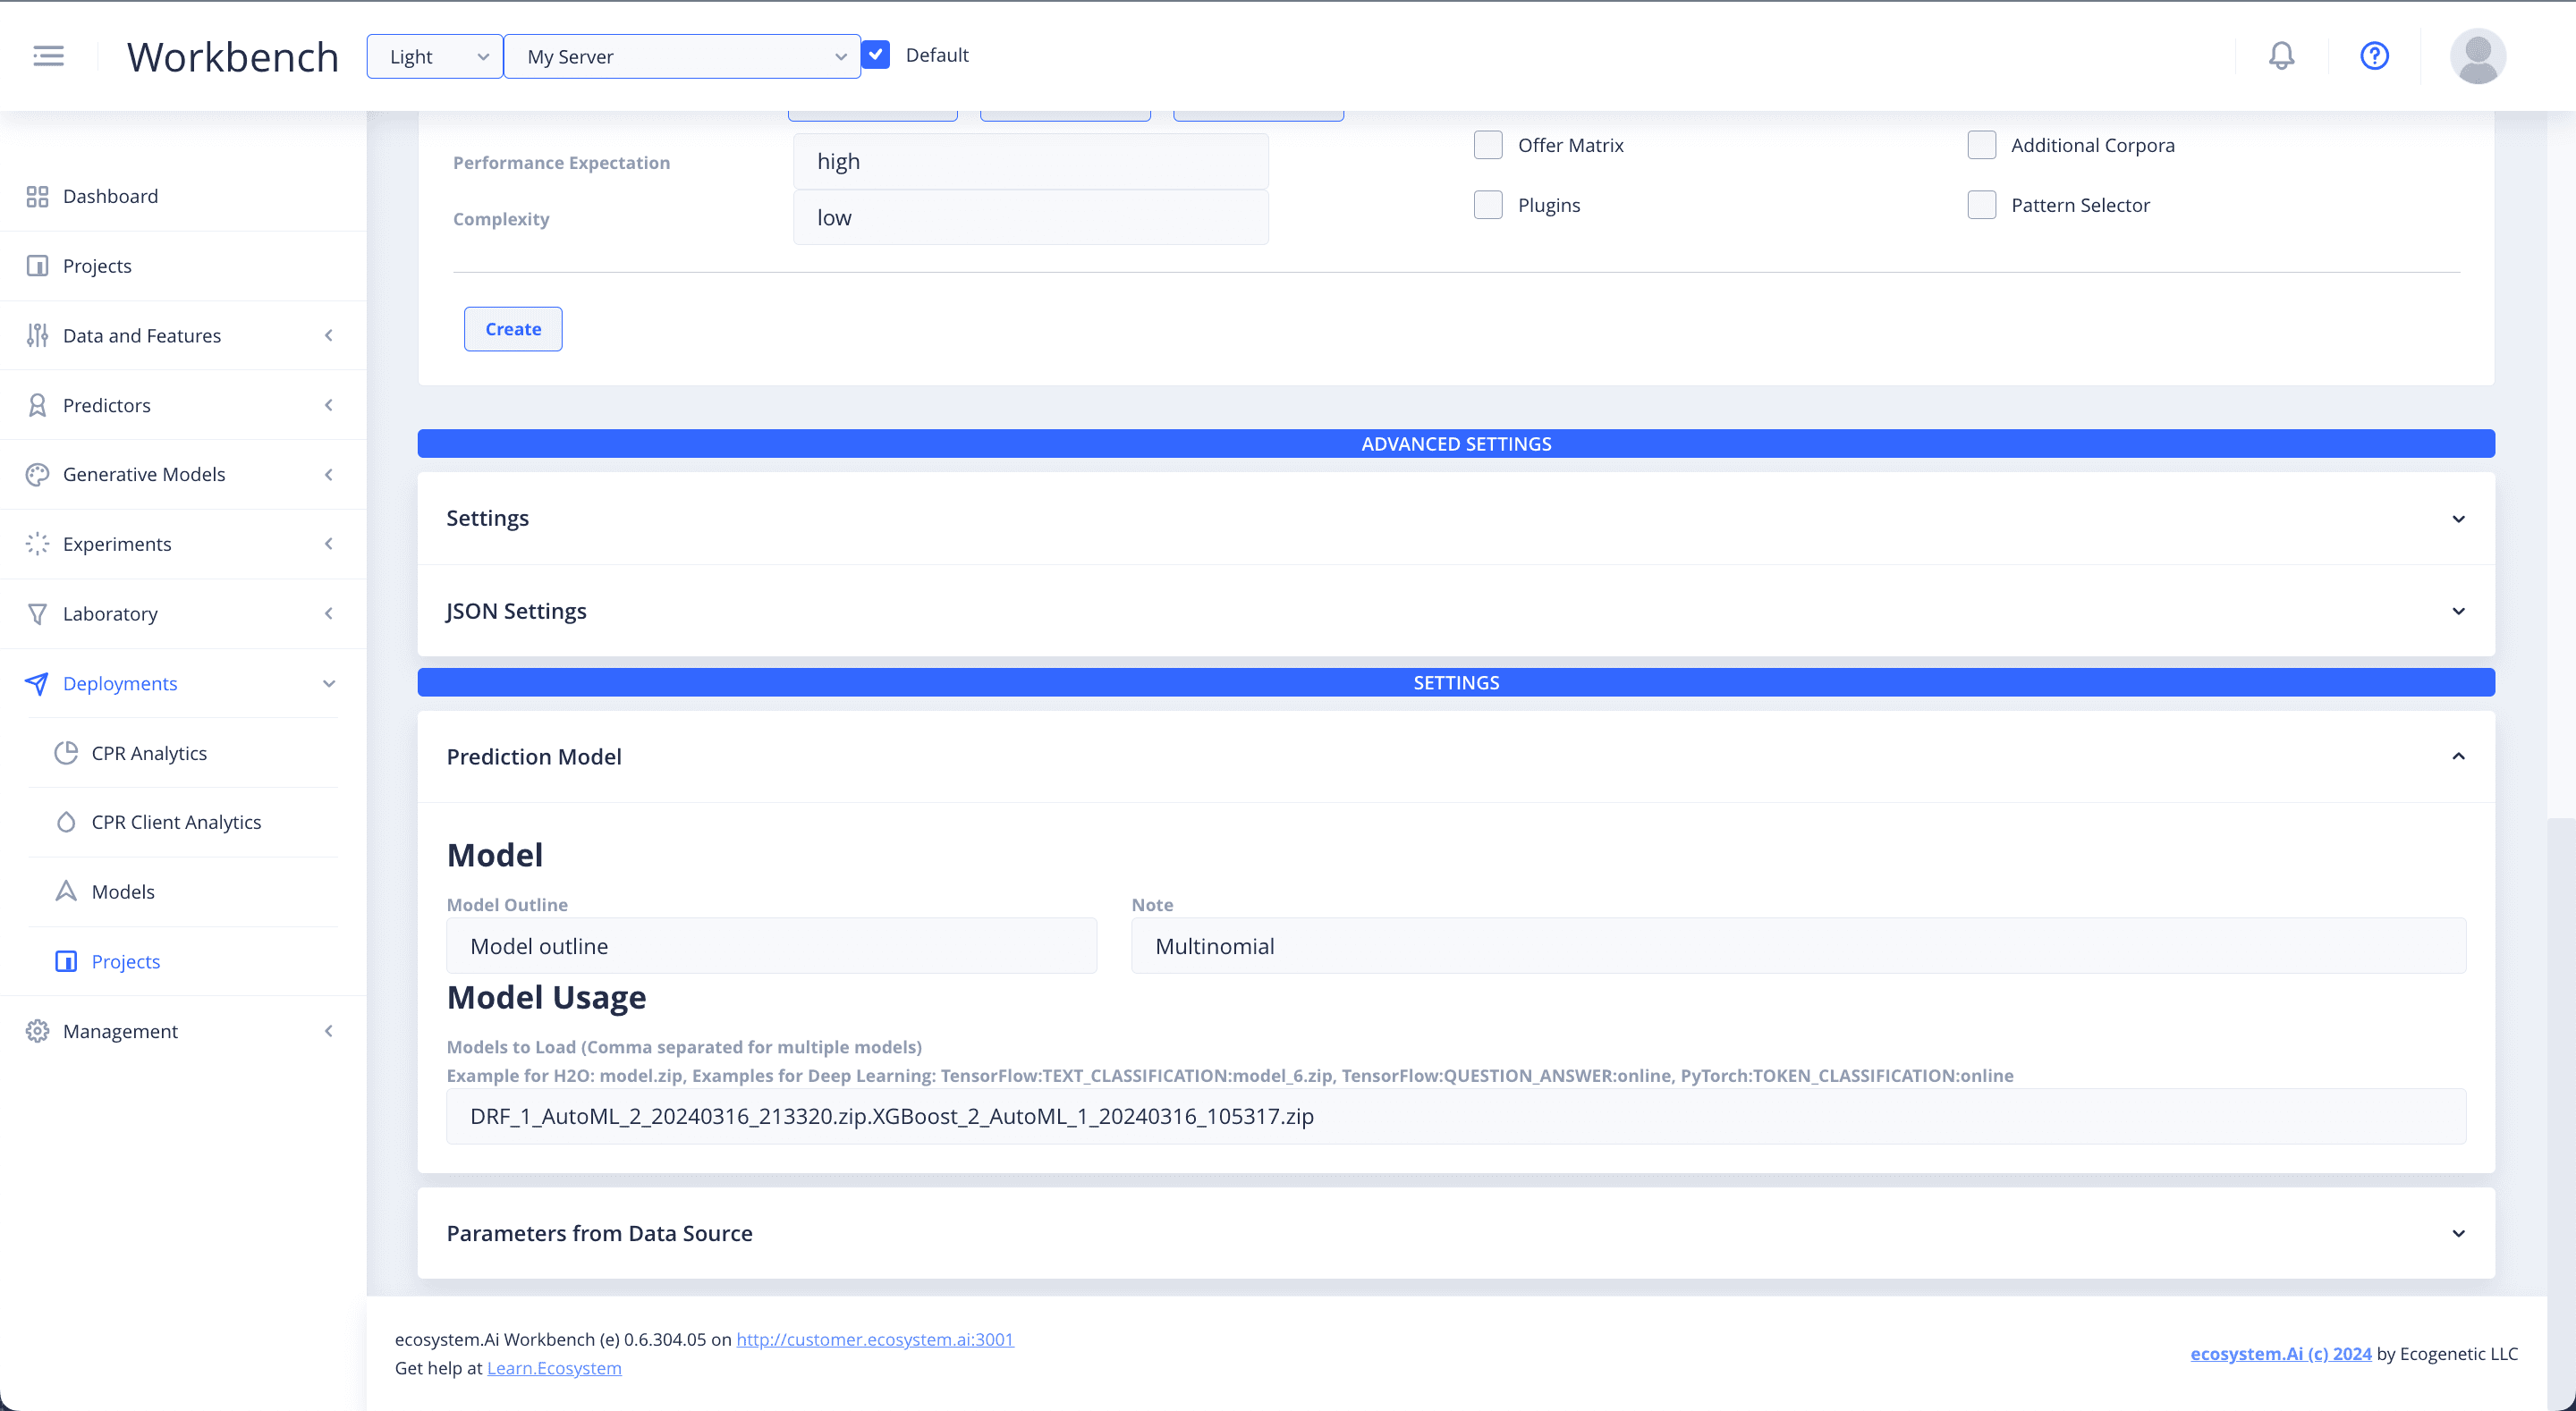
Prediction Model
Select Prediction Model and specify the model that you want to use in your recommender. Enter the names of the models that you have generated, trained and saved in Predictions for deployment.
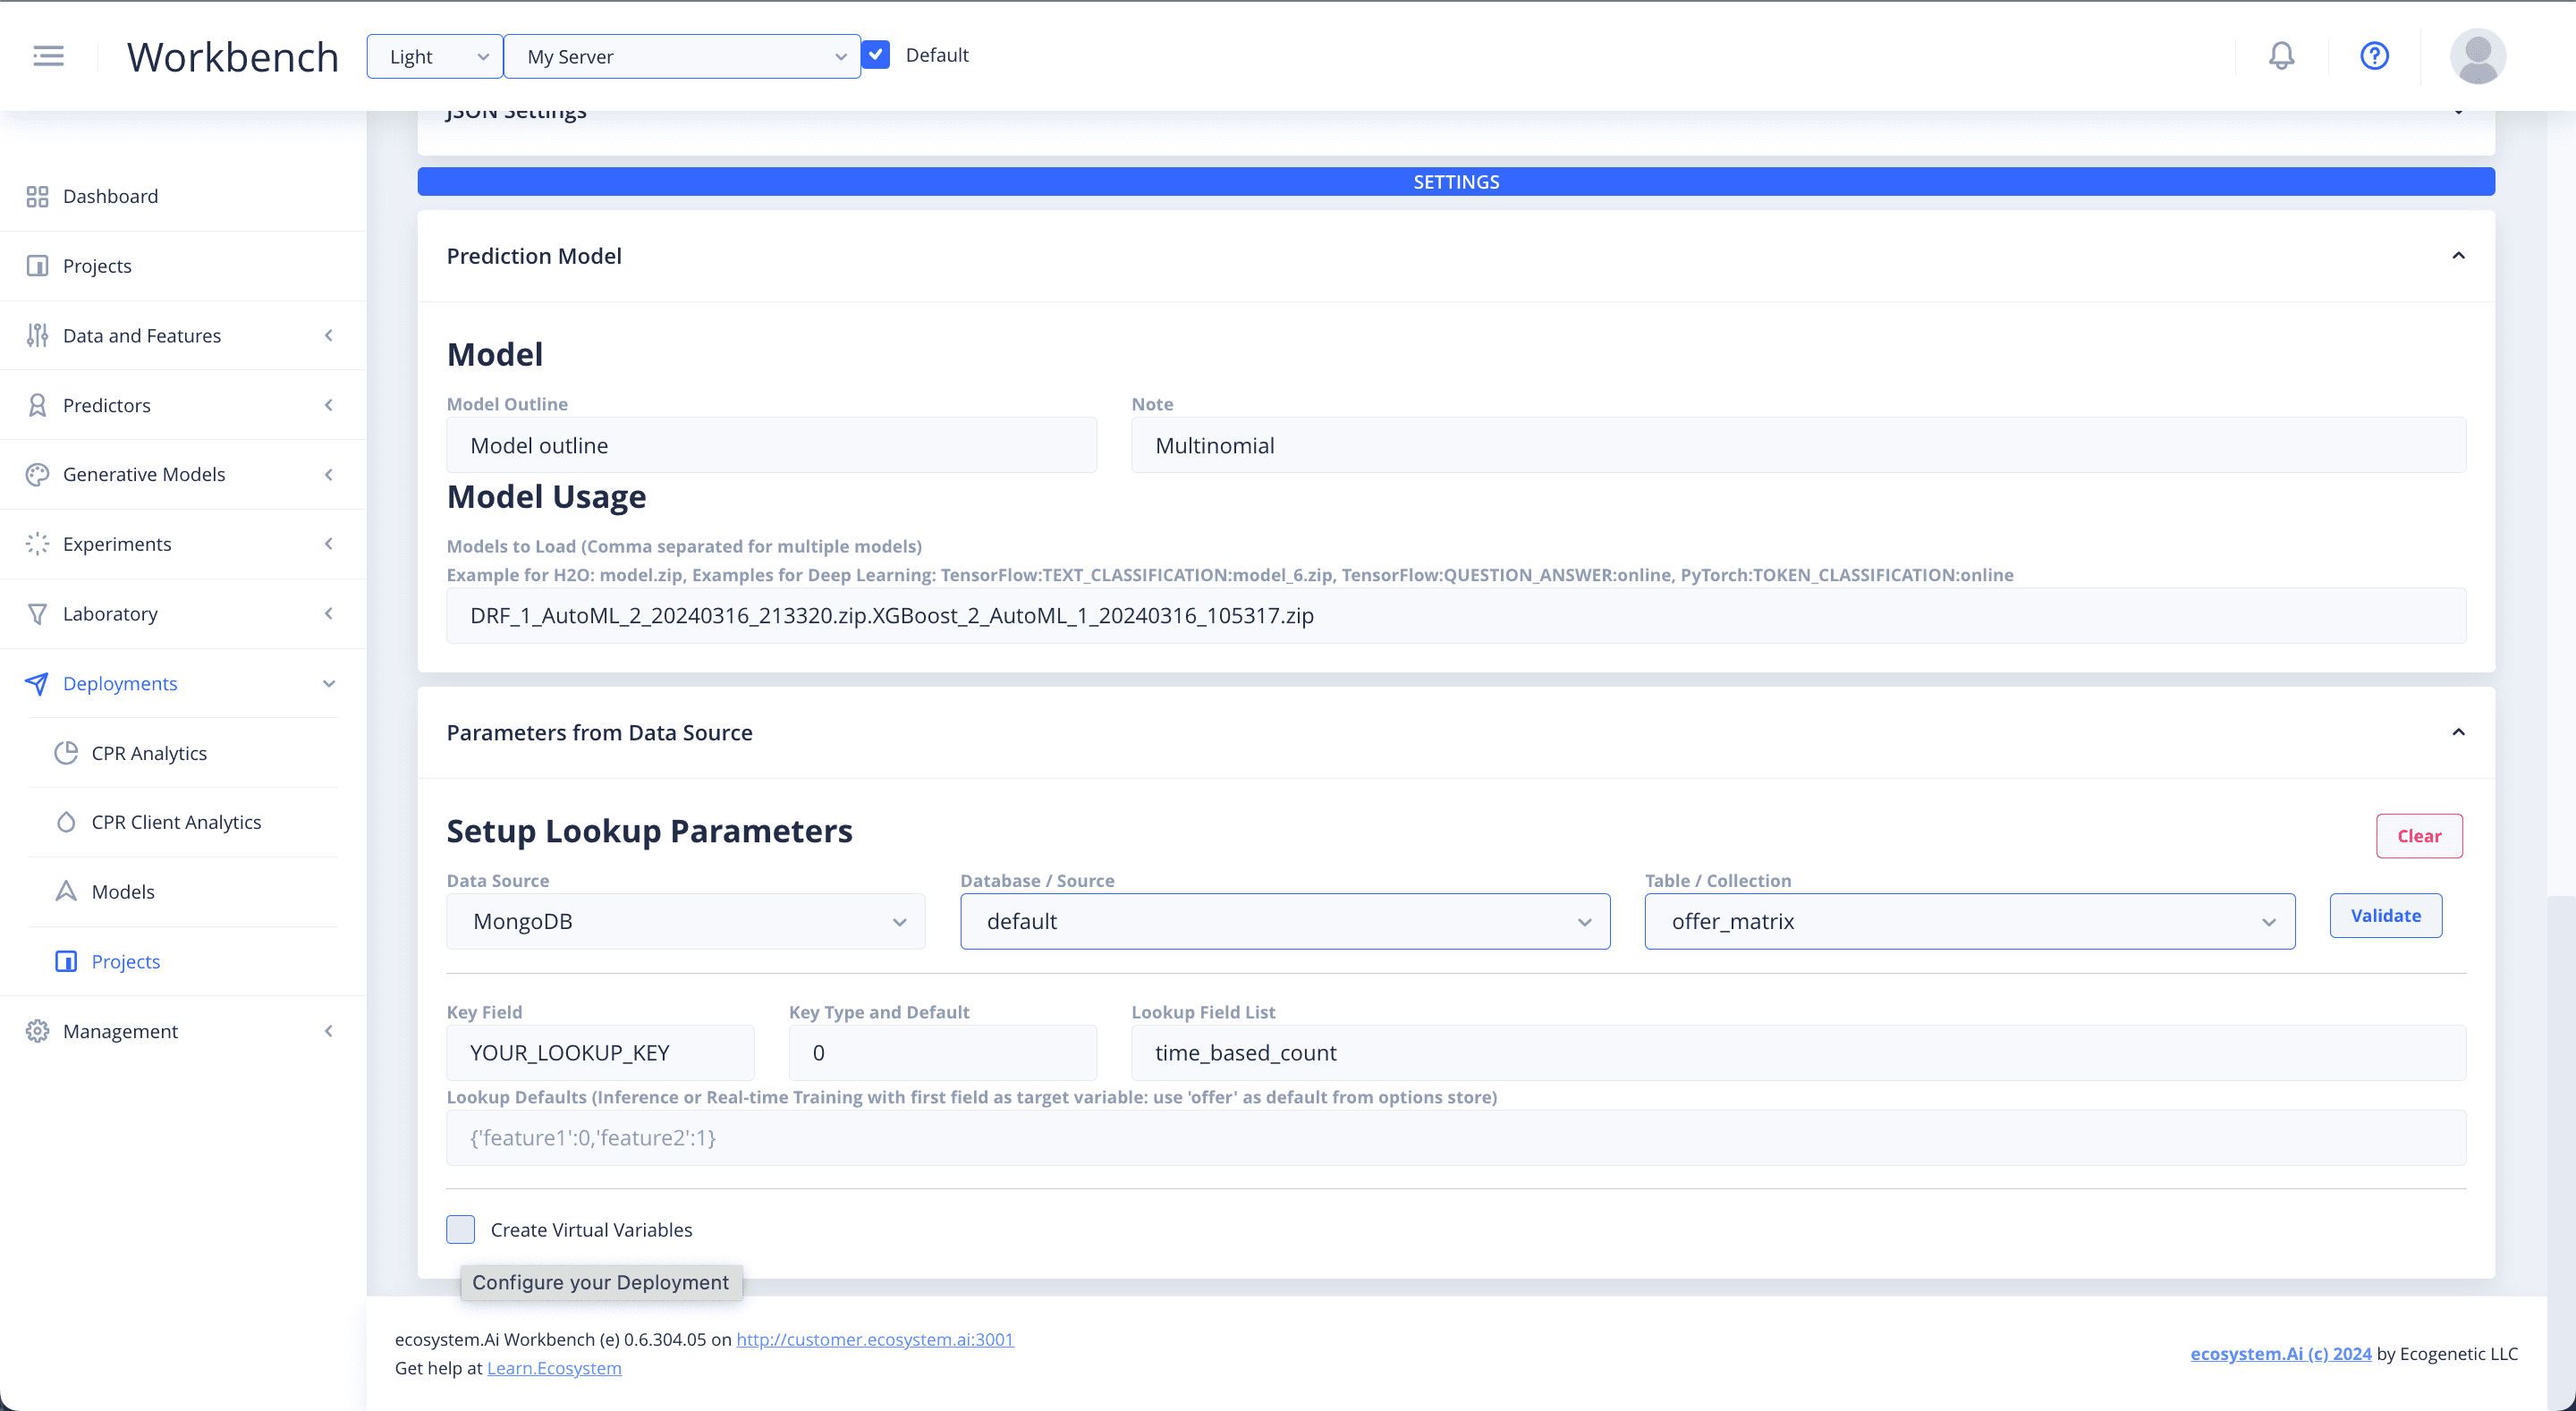
Parameters from Data Source
Select Parameters from Data Source to access a database. This is for when you want to get data for making predictions from a database that is accessible to your production environment. The alternative to this, is passing the data through the API. Data uploaded to the platform and ingested, will be available to the recommender in production.
Serving Engine Settings
There are a range of different Serving Engine Settings that can be selected to enhance the functionality of your deployments.
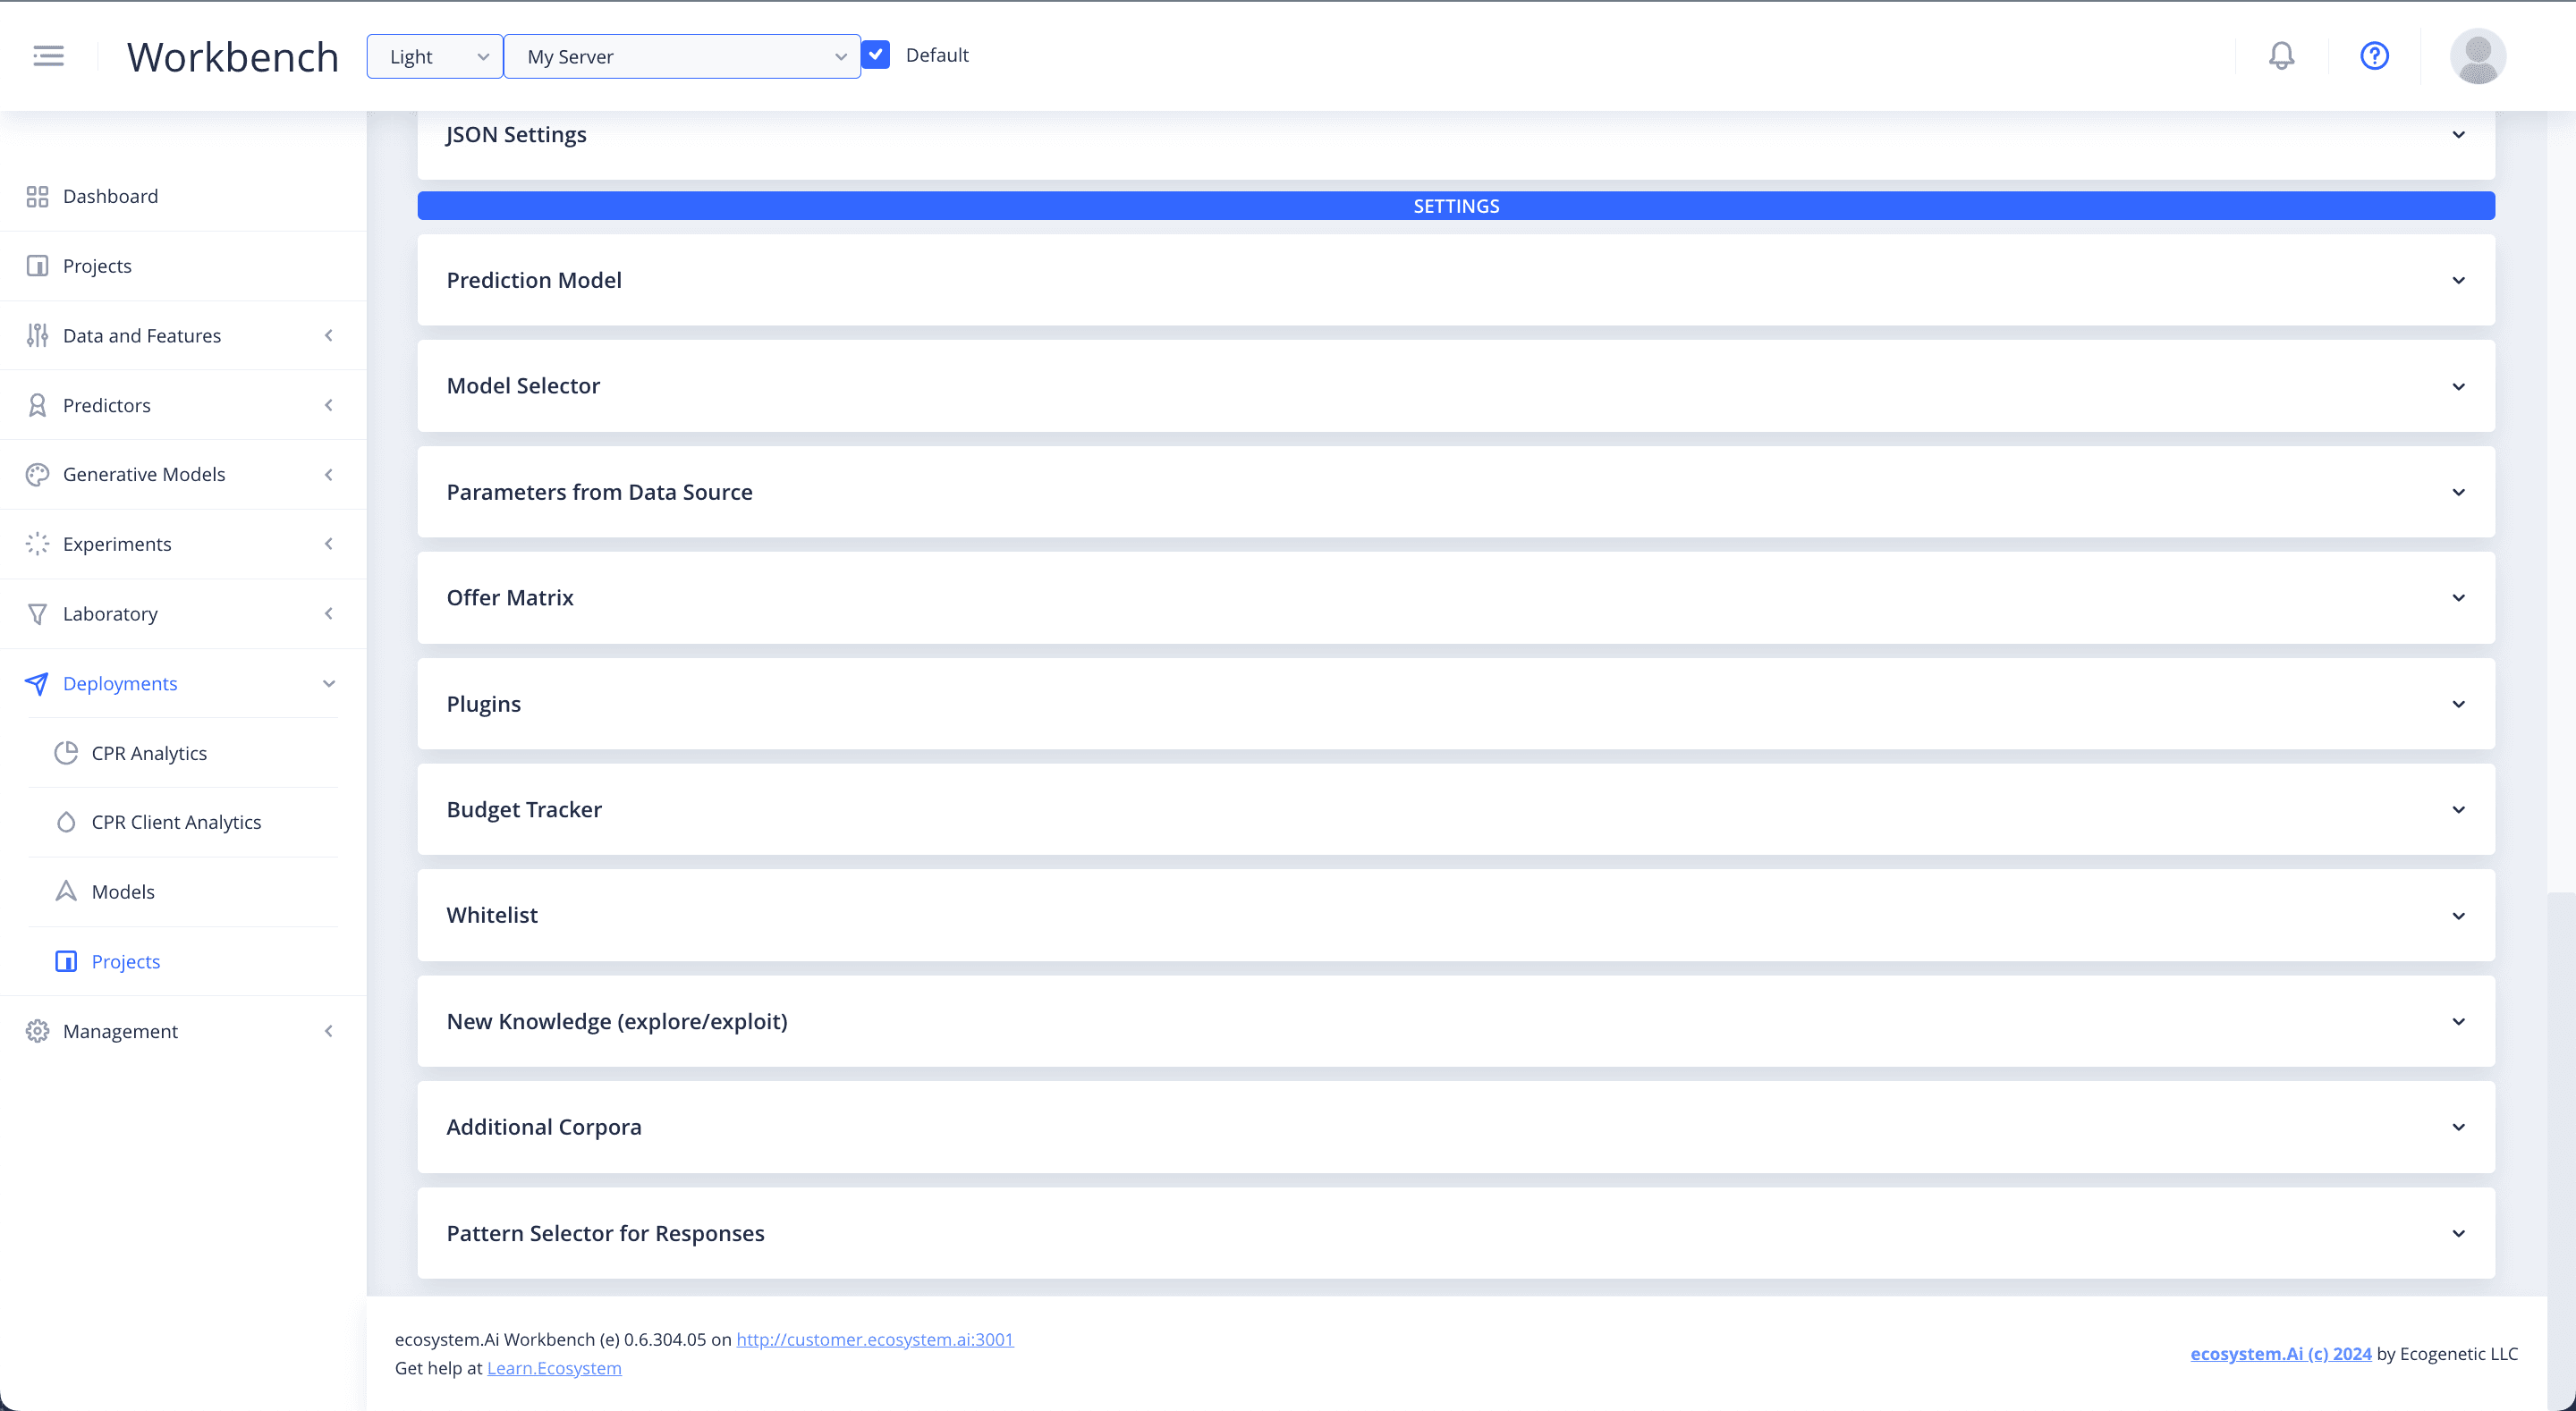
Offer matrix
Loaded in memory and accessed in the plugins. For the purpose of default pricing, category and other forms of lookup. To use default functionality you need to review the specific data format.
Plugins
Supports three primary areas: API definition, pre-score logic and post-score logic. There are a number of post-score templates.
Budget Tracker
Track offers and other items used through the scoring engine, and alter the behavior of the scoring system. Must include the post-score template for this option to work.
Whitelist
Allows you to test certain options with customers. The results will be obtained from a lookup table. Must include the post-score template for this option to work.
New knowledge
Allows you to add exploration to your recommender. This will happen by specifying the epsilon parameter. Epsilon% (eg. 0.3 = 30%) of the interactions will be selected at random, while the remaining ones will be selected using the model.
Pattern selector
Allows different patterns when options are presented, through the scoring engine result.
Push Configuration
Remember to Update! When you are done with your deployment configuration, click Push to set the deployment up in your specified environment. No downtime is required! The Generate and Build buttons are not needed for now, they are designed for Enterprise and on-premise setups.